10 Desktop CNC Projects for Beginners: Learn CNC by Building Real Parts
Last updated: 2026-08 | Tested on: All projects in this guide were validated on the HiMill D1S desktop CNC (other machines can reproduce them, but efficiency, tool life, and finish quality will vary with rigidity, spindle, and workholding).
Quick Answer (TL;DR)
The fastest way to learn CNC isn't memorizing specs—it's completing CNC projects in the right order. Start with wood to learn 2D toolpaths and basic workholding, move to acrylic to master heat control and precision, then step into aluminum and brass to learn chip evacuation, deburring, and repeatability. Finally, finish with an all-aluminum functional tool project to tie everything together into a real workflow.
- 10 projects across 4 skill levels: Wood → Acrylic → Aluminum/Brass → All-aluminum functional part
- Level 1 goal: quickly complete the full loop: design/toolpath → workholding → zeroing → cutting → finishing
- After Level 3: success depends more on process discipline than "bigger numbers" (many failures come from workholding and chip control, not the machine itself)
Ready to move from learning CNC projects to building real functional parts? Explore MAXMAKE desktop CNC machines designed for makers who want more workspace, higher precision, and the ability to machine a wider range of materials.
What Can a Beginner CNC Machine Make?
Looking for beginner CNC project ideas? CNC machine examples include coasters, jewelry stands, pendants, carved combs, acrylic lamps, metal nameplates, relief lights, tool organizers, commemorative coins, and all-aluminum tools—if you follow a difficulty ladder and build skills in workholding, tool choice, and workflow.
Table 1: Project Overview
| # | Project | Category | Main Material | Est. Time | Machine Tier | Difficulty |
|---|---|---|---|---|---|---|
| 1 | Coaster | Gift | Wood | ~1–2h | Entry | 🟢 |
| 2 | Light-up Cat Jewelry Stand | Gift | Acrylic | ~2–3h | Entry+ | 🟡 |
| 3 | Fishbone Pendant | Gift | Acrylic + Wood | ~1–2h | Entry+ | 🟡 |
| 4 | Pixiu-Pattern Wooden Comb | Gift | Wood / model board | ~2–3h | Entry+ | 🟡 |
| 5 | Acrylic Interlocking Lamp (Cyber Mood Lamp) | Gift | Acrylic | ~2–4h | Entry+ | 🟡 |
| 6 | Aluminum "Paw" Nameplate (Pet Tag) | Utility | 6061 aluminum | ~2–3h | Prosumer | 🟠 |
| 7 | 3D Relief Moon Lamp | Gift | Nylon / translucent sheet | ~6–8h | Prosumer | 🟠 |
| 8 | Layered CNC Tool Organizer Box | Utility | Solid wood | ~2–4h | Entry+ / Prosumer | 🟡🟠 |
| 9 | Napoleon-Themed Brass Coin | Gift | Brass | ~4–6h | Prosumer+ | 🔴 |
| 10 | Minimal Industrial All-Aluminum Scraper | Utility | Aluminum | ~4–6h | Prosumer+ | 🔴 |
Note: Time estimates are beginner-friendly ranges. Actual times may vary significantly depending on your workflow speed and finishing effort.
The CNC Skill Ladder: Why the Order Matters
- Level 1: Basics (2D + Wood) 🟢 — Build confidence fast with CNC wood projects: basic toolpaths, contouring, pocketing, tabs, and stable workholding.
- Level 2: Material Mastery (Acrylic + Fine Details) 🟡 — Learn heat management and surface quality: reduce melting, whitening, and burrs; improve small-part handling.
- Level 3: The Metal Milestone (Aluminum + Long Runs) 🟠 — Learn "real machining discipline": chip evacuation, light lubrication, conservative cuts, deburring, and repeatability.
- Level 4: Advanced Workflows (Brass Detail + All-Aluminum Functional Part) 🔴 — The capstone: fine detail replication (brass) and ergonomic feel and edge finishing (all-aluminum tool).
Pre-Project Checklist (Beginner Defaults)
How to Choose Materials (to Minimize Frustration)
- Wood / model board: most forgiving; best for building workflow habits.
- Acrylic (PMMA): huge visual payoff; teaches heat control and chip evacuation.
- 6061 aluminum: demands better workholding and chip control; ideal after Level 1–2.
- Brass: more about fine detail and finishing; great for advanced skill building.
- Nylon / translucent sheet: perfect for long 3D relief work—patience and stable setup matter.
The "Minimum Viable" Bit Set (enough for most Level 1–2)
- Flat end mill: contouring and pocketing workhorse
- V-bit / engraving tip: text and fine lines
- Ball nose: 3D surfaces and relief finishing
Rule of thumb: get the basics done first, then expand tooling based on your project types.
Workholding & Safety: 3 Non-Negotiables
- Eye protection + dust/chip extraction are baseline requirements (wood, acrylic, and metal chips all require proper extraction).
- The workpiece must be firmly secured (clamps, vise, tape methods, etc.)—the goal is zero movement and zero lifting.
- Use tabs (or an equivalent strategy) on through-cuts to prevent parts from flying or chipping.
What Machine Level Do You Need for These Projects?
| Level | Minimum Requirement (concept) | What You'll Notice in Real Use |
|---|---|---|
| Level 1 (Wood) | Entry machine is fine | Biggest differences are workflow comfort and workholding ease |
| Level 2 (Acrylic/Details) | More stable structure helps | Fewer edge defects, fewer reworks |
| Level 3 (Aluminum) | Higher rigidity + better workholding & chip control | Much higher success rate and more controllable surface finish |
| Level 4 (Brass/All-aluminum tool) | Mature process + finishing habits | Detail quality and "feel" become the deciding factor |
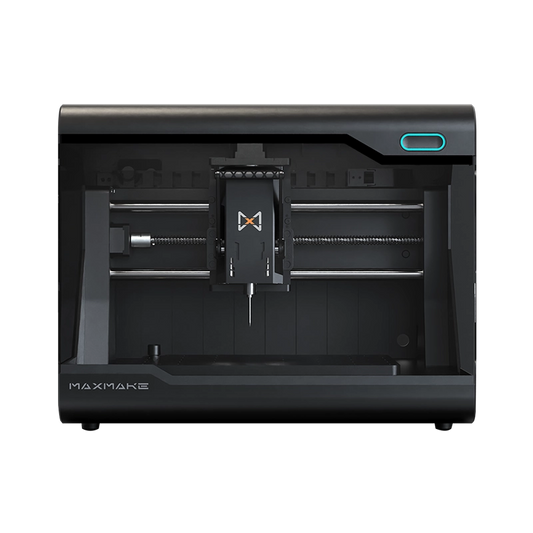
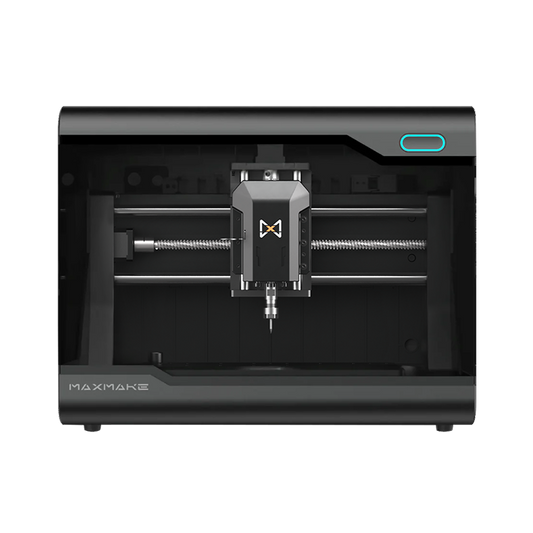
If your goal is reliable aluminum and brass work, the HiMill D1S is designed for Level 3–4 style practice—its cast aluminum frame and ball screws provide the rigidity and repeatability needed for conservative aluminum cuts, and the quick-tool-change (QTC) system reduces workflow friction.
10 CNC Projects for Beginners (Quick Case-Study Descriptions)
Level 1: The "Quick Wins" (Wood) 🟢
These CNC woodworking projects are designed to build confidence fast—simple shapes, forgiving material, and immediate results.
1) Coaster

- What you get: a practical desk item (great as a set or gift).
- What you learn: contouring, pocketing/engraving, tabs, basic edge finishing.
Quick steps:
- Design a simple shape (round/square) + shallow pattern or text.
- Pocket/engrave first, then cut the outer contour (keep tabs).
- Remove tabs, sand edges, apply surface finish (optional).
Pitfall: skipping tabs on a through-cut is a common first-day failure; small parts must be securely held.
Level 2: Surface Quality & Heat Control (Acrylic / Fine Details) 🟡
2) Light-up Cat Jewelry Stand

- What you get: a glowing desk organizer for necklaces, earrings, and rings.
- What you learn: clean acrylic cutting, engraving lines that "catch" light, and the correct order (inside features first, outer cut last).
Quick steps:
- Engrave details (face/text/texture) first, then cut holes, then cut the outer profile.
- After machining: deburr, peel film, insert into LED base, and light up.
- Adjust slot fit or sheet dimensions if needed (a second version is normal).
Pitfall: acrylic shifts easily—workholding quality largely determines success; poor heat control causes whitening or chipping.
3) Fishbone Pendant

- What you get: a small pendant/keychain-style accessory.
- What you learn: small-part workholding, fine contour machining, edge finish, and material pairing for decorative effect.
Quick steps:
- Machine the fishbone outline and details separately (different materials can be processed independently).
- Clean edge burrs, drill holes, and attach hardware.
- Assemble and check "hang point" strength and edge finish.
Pitfall: tiny parts are prone to lifting or flying—insufficient workholding leads to incomplete outlines or broken edges.
4) Pixiu-Pattern Wooden Comb

- What you get: a carved comb with decorative texture—a "premium-looking" woodworking project.
- What you learn: texture/detail machining plus finishing workflow (sanding + optional painting).
Quick steps:
- Machine the outer shape and large contour first, then add surface texture details.
- After machining: sand edges and surface, apply paint/color (optional).
- Check comb teeth edges for smoothness; do a second fine sanding if needed.
Pitfall: finer texture demands more finishing; sanding and coloring determine much of the final look.
5) Acrylic Interlocking Lamp (Cyber Mood Lamp)

- What you get: a glue-free interlocking acrylic lamp structure—just add a light base.
- What you learn: dimensional consistency of interlocking structures, acrylic edge quality, and the "test-fit first" iteration mindset.
Quick steps:
- Machine the interlocking panels and slot structures.
- Lightly deburr, peel film, then assemble in order.
- Install the light base and bulb; check stability and light transmission.
Pitfall: first versions are often too tight or too loose—iteration is the fastest way to learn.
Level 3: Moving into Metal & Long-Run Machining (Aluminum / 3D Relief) 🟠
6) Aluminum "Paw" Nameplate (Pet Tag)

- What you get: a durable, water-resistant metal tag (optionally filled with color resin/paint).
- What you learn: aluminum basics—secure workholding, chip clearing, deburring, and safe edges.
Quick steps:
- Pocket the pattern/area first, then cut the outer profile and hole.
- After machining: sand edges, apply color fill and cure (optional).
- Attach hardware; check that edges are rounded and safe.
Pitfall: poor chip clearing causes surface scoring; always round and finish edges carefully. During testing on the HiMill D1S, the cast aluminum frame provided rigidity that made chip evacuation smoother and surface finish more consistent.
7) 3D Relief Moon Lamp

- What you get: a textured "moon surface" relief piece with backlighting—a "time-consuming but highly photogenic" project.
- What you learn: roughing vs. finishing strategy and stable long-duration machining habits.
Quick steps:
- Rough out material quickly and establish the large contour.
- Finish with a fine surface toolpath to restore detail (this is the time-consuming core).
- Sand to the desired translucency and assemble the backlight.
Pitfall: keep the setup stable; do not change the workpiece or reference mid-run.
8) Layered CNC Tool Organizer Box

- What you get: a layered tool organizer that keeps end mills and loose tools tidy.
- What you learn: multi-zone pocketing, hole/counterbore planning, machining order, and wood edge quality control.
Quick steps:
- Plan functional zones (upper square slots, lower counterbored holes, edge roundovers).
- Machine internal structures first, then the outer contour.
- After machining: sand, oil, and add non-slip pads (optional).
Pitfall: the quality difference between "okay" and "great" is mostly sanding and oiling; clear chips during machining to reduce chipping.
Level 4: The Capstone (Brass Detail + All-Aluminum Functional Part) 🔴
9) Napoleon-Themed Brass Coin

- What you get: a commemorative brass coin with fine relief detail—suitable as a desk piece or collectible.
- What you learn: rough + fine detail finishing, cleanup, polishing, and consistency.
Quick steps:
- Rough the base shape and large contour.
- Finish with a fine-detail relief pass for texture and text.
- Deburr, clean, and polish to make details pop.
Pitfall: don't chase extreme depth/detail too early—stable, repeatable detail wins; finishing determines the final quality.
10) Minimal Industrial All-Aluminum Scraper

- What you get: a functional all-metal scraper/tool with an "industrial design" feel.
- What you learn: workflow planning, edge chamfering for ergonomic feel, and standardized finishing.
Quick steps:
- Rough the overall profile and internal cutouts in layers.
- Finish surfaces and contours; add edge chamfers.
- Deburr, sand/polish, and apply surface treatment (optional).
Pitfall: "feel" comes from chamfering and deburring; inconsistent workholding causes uneven edges and compromises the final result.
Where to Find CNC Project Files (or Make Your Own)
- Free sources: software/brand project libraries and community forums (quality varies—start with Level 1).
- Paid sources: file marketplaces (check reviews and file formats before buying).
- Beginner-friendly design software: Carbide Create, Fusion 360 (personal use), and Easel are great starting points.
Simple advice: complete Level 1 with proven CNC designs first, then learn basic sketching and simple CAM so you can start customizing sizes, text, and structure.
Frequently Asked Questions (FAQ)
What is the easiest thing to make on a CNC?
A coaster or a simple engraved sign—both are easy CNC projects for beginners. They typically require only a basic 2D toolpath, one end mill, and forgiving material—perfect for your first session.
Can I cut aluminum with a hobby CNC?
Yes, but it requires rigid workholding, good chip clearing, and conservative cutting strategies. If you want to machine aluminum regularly, choose a higher-rigidity machine—such as the HiMill D1S with its cast aluminum frame and ball screws, which makes a noticeable difference in surface quality and success rate.
How long does it take to learn CNC?
Many beginners finish their first Level 1 project within 2–3 hours of learning basic CAM. Reaching consistent aluminum machining typically requires more systematic practice and iteration.
Do I need CAD/CAM for every project?
No. You can start with ready-made files. However, learning basic CAM gives you the flexibility to adjust sizes, text, and structural details.
Is a desktop CNC loud?
Noise depends on material, tooling, spindle, and dust collection. Metal work is typically louder; an enclosure and optimized cutting strategy help significantly.
Final Thoughts: From First Cuts to Functional Parts
Learning CNC is not about starting with the most expensive machine — it’s about building skills through the right projects and gradually increasing your machining capability.
Start with simple materials to understand the workflow, then move toward aluminum and functional parts as your skills grow. As projects become more advanced, machine rigidity, precision, and workflow efficiency become increasingly important.
Ready to move beyond beginner projects and create functional parts?
Explore HiMill D1S and see how a more capable desktop CNC can help you move from learning CNC to making real-world functional parts.
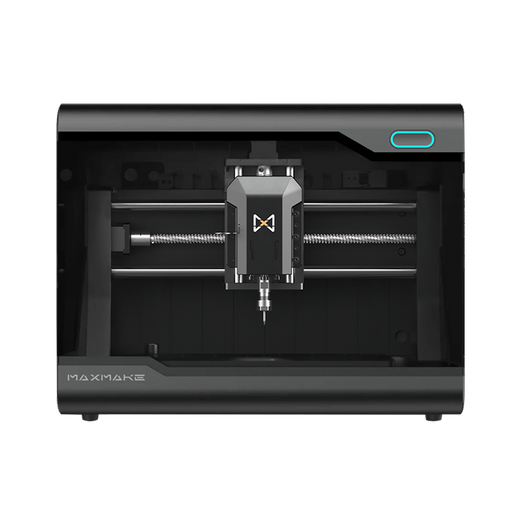
HiMill D1 Desktop CNC Machine
Connect with the MAXMAKE community
Share your projects, discover new ideas, and connect with other makers.
Join Our Community
Share projects, ask questions, connect with makers