How to Use Easel CNC Software with HiMill D1S (Step-by-Step Workflow)
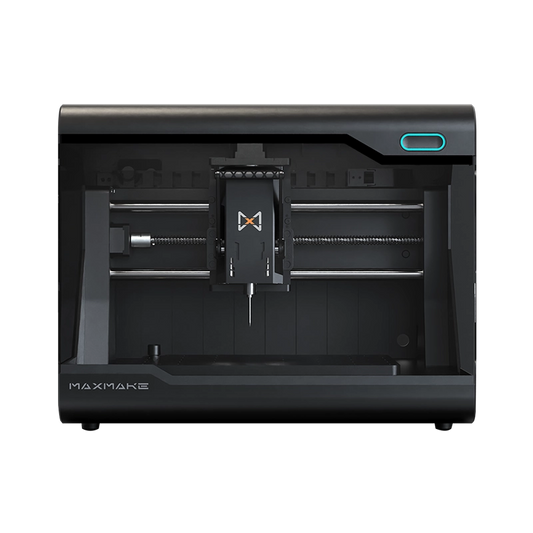
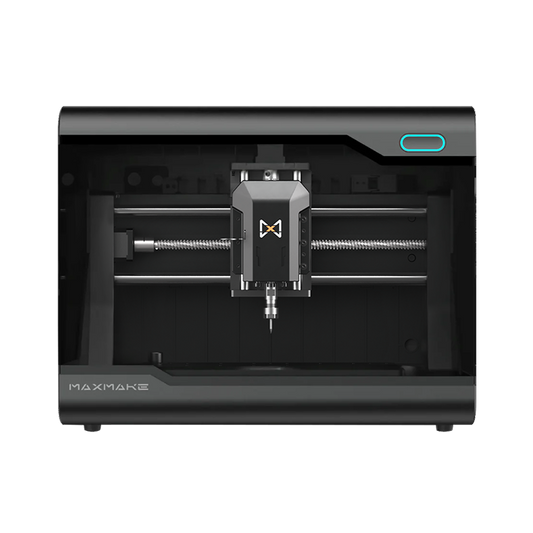
Yes, you can use Easel CNC software with the HiMill D1S. Easel is the browser-based CNC design tool most beginners start with — you can sketch, generate toolpaths, and carve right in the browser. The step-by-step setup below shows the full workflow: design in Easel, export the NC (G-code), and load it into MaxmakeLAB to run the job.
In This Step-by-Step Guide
In this step-by-step guide, you get three things:
- A step-by-step, D1S-specific setup workflow (using a 3D relief rough + finish pass as the example)
- How to choose between Easel Free, Starter, and Easel Pro (based on the official differences)
- 5 free Easel project files for HiMill D1S beginners (DXF + NC)
What Is Easel CNC Software (and Who It's For)
Easel is a free, browser-based CNC software — and for most newcomers it's one of the best beginner CNC programs to start with: you can design, generate toolpaths, and carve / export G-code for each project right in the web page. Its biggest strength is the low learning curve, which is why it's common in school classrooms, makerspaces, and the X‑Carve community.
This article is for you if:
- You just bought a HiMill D1S and want to get a working Easel workflow running quickly
- You're an existing Easel user on X‑Carve / 3018: you want to keep your software but step up to a stiffer metal desktop machine
- You're a teacher or run a makerspace: you want a workflow students can understand and finish projects with quickly
If you're a complete beginner (first time using CNC software), here's how I'd start:
- Start with 2D projects (contours / pockets / engraving) on MDF, plywood, or acrylic; don't jump straight into 3D or aluminum.
- Always run an Air Cut first: confirm it won't overshoot or hit your clamps before cutting the real material.
- Easel Free is fine for learning, but it limits how many times you can export each week; if you plan to run several small projects a week, Starter will feel much smoother.
Easel + HiMill D1S Compatibility: The Workflow That Actually Gets Jobs Done
Let's keep it simple: Easel handles your design and toolpaths just fine; for actually running the machine, use MaxmakeLAB.
Easel's official docs say it clearly: Easel is built around Inventables machines, so connecting a third-party CNC — including GRBL-style controllers — is not always plug-and-play. Some machines can live-carve directly from Easel, others work better with exported G-code run in the machine's own software. The D1S is the latter kind, which is why this guide uses the export + MaxmakeLAB route.
The most reliable workflow: generate the toolpath in Easel → export NC (G-code) → import and machine in MaxmakeLAB.
Easel CNC + HiMill D1S Setup: A Step-by-Step Workflow (7 Steps, 3D Relief Rough + Finish)
Overall flow: set the stock and origin → import the 3D model → rough with a flat end mill, finish with a ball nose or engraving bit → Cut Settings → Preview → export the rough and finish NC files.
Note: Easel's 3D carving is a Pro feature (not in Free/Starter).
New Project: Set the Stock Size and Origin
Set the stock size and origin when you create the project. Example stock: 40×60×10mm; origin: center of the material surface (if you're on Free/Starter and don't have the center-zero option, the default corner zero works fine).

Import: Import and Center the 3D Model
Click Import and load your 3D model; the 10mm model height matches the stock thickness. Center the model and double-check that its highest point doesn't exceed the stock thickness.

Tools: Flat End Mill for Roughing + Ball Nose for Finishing (or Try an Engraving Bit)
Two bits are the norm for Easel relief carving: a flat end mill for roughing and a ball nose for finishing.
- Roughing: click the roughing bit → select Other → set 1.5mm
- Finishing: if you want to try a 30°×0.2mm flat engraving bit, define 0.2mm yourself and check the detail and time in Preview first


Cut Settings: Set the Rough and Finish Parameters Separately (Don't Overdo the RPM)
Open Cut Settings and set the roughing and finishing parameters separately. Keep the S value at or below 13,000 RPM — don't set 16k/18k/24k.


Calculate + Preview: Generate the Toolpaths and Check the Result
Click Calculate to generate the toolpaths, then hit Show Preview to watch the roughing and finishing passes and check the surface result. Easel adds tabs (bridges) by default, which is genuinely friendlier for beginners.


Export: Export Two Toolpath Files (Rough and Finish Separately)
At the end, export two toolpath files: one roughing file and one finishing file (usually downloaded as a package). Name them like xxx_rough.nc and xxx_finish.nc so you don't grab the wrong one at the machine.

MaxmakeLAB: Import and Machine (Rough First, Then Finish)
Import the roughing NC into MaxmakeLAB and run it; after the bit change, re-zero / re-set the origin, then import the finishing NC and run it. On your first try, do an Air Cut first to confirm the toolpath.

Why Move From X‑Carve to the HiMill D1S + Easel
If you've built up a lot of Easel projects on X‑Carve, the biggest worry before upgrading is usually: will my old projects be wasted? Don't worry — as long as the finished size fits within the D1S working area, most small-to-medium Easel projects can be reused as-is, with little to no redrawing. All you really need to do is swap the "machine size" and "cut parameters" for the D1S versions.
A 3-Step Migration Checklist
-
Size Check
- The D1S effective working area is 280×200×80 mm.
- As long as your .easel project's finished size is ≤ 280×200, you can usually reuse it directly; if it's larger, scale it down or split it into two setups / two boards.
-
Machine Profile Swap
- Open the old .easel project and switch the Machine from X‑Carve to the HiMill D1S profile (at minimum, change the work area to 280×200×80).
- This step keeps Easel from planning toolpaths for X‑Carve's larger bed and driving the D1S past its travel.
-
Cut Settings Tune
- The same project can often run more stable and faster on the D1S, but don't copy your X‑Carve depth-of-cut / feed rates straight over.
- Instead, set Cut Settings to the D1S presets in this article (MDF / acrylic / soft aluminum), start at 70% of the recommended feed rate on your first cut, and work up gradually.
What Changes Will You Actually Notice?
Cutting MDF as an example: feeds on X‑Carve usually sit around 800–1000 mm/min; the D1S is a stiffer, more accurate machine, so the same project can typically push feeds to 1200–1500 mm/min (as long as your bits, workholding, and chip evacuation keep up). The most visible result: the same classroom assignment or small project finishes noticeably faster, with fewer trial-and-error costs.
When Should You Move to More Professional Software?
Once you start on these two kinds of work, Easel will start to feel limited:
- Serious aluminum / brass cutting (needs more stable metal-machining strategies, real-time parameter tuning, stronger CAM)
- More complex 2.5D / 3D projects (reliefs, curved surfaces, detailed textures)
Easel Free vs Starter vs Easel Pro: Which One Should HiMill D1S Users Choose?
Easel now has three tiers — Free, Starter, and Easel Pro. The real differences come down to two things: the weekly export allowance and access to advanced toolpaths like 3D carving.
- Free: full design tools, but only 1 carve or G-code export per week
- Starter: 20 carves / exports per week, plus raster carving, ramping, center zero, etc.
- Pro: unlimited exports, plus V-carving and 3D carving (STL)
Bottom line:
- Student / newbie making one project a week → Free is enough
- Heavy weekend project maker → Starter is smoother
- V-carving / 3D relief / full capabilities → Pro is a real need
Easel Feeds & Speeds for HiMill D1S Beginners (MDF, Acrylic, Soft Aluminum)
- ⚠️ Note: these are typical Easel-style starting parameters — be extra conservative on Easel Free, which limits how often you can export — and they differ from the numbers in the MillMage / Vectric articles.
- All parameters: start your first test cut at 70% of the recommended feed rate, then raise it once it's stable.
- Cooling: for aluminum, use air cooling or a WD‑40 mist, and keep the chips clear.
- The S values in the table below are all given as 12,000–13,000.
| Material | Bit | Bit Diameter | Spindle Speed S (RPM) | Feed Rate F (mm/min) | Depth per Pass ap (mm) | Notes (D1S vs X-Carve / 3018) |
|---|---|---|---|---|---|---|
| MDF / plywood | Two-flute up/down-cut spiral bit | 3.175 mm | 12,000 – 13,000 | 1,200 – 1,500 | 1.5 – 2.0 | Most entry-level / light machines run F around 800–1000 on this material; the D1S has more headroom |
| Acrylic (PMMA) | Single-flute acrylic bit | 3.175 mm | 12,000 – 13,000 | 900 – 1,200 | 1.0 – 1.2 | Cutting too slowly melts the acrylic and sticks to the bit — prioritize chip clearing |
| Soft aluminum (1060 / thin 6061) | Single-flute aluminum bit | 3.175 mm | 12,000 – 13,000 | 200 – 300 | 0.05 – 0.10 | ⚠️ Easel Free isn't ideal for serious aluminum cutting; for efficient aluminum work, switch to MillMage / Vectric |
What this means in practice
Wood and acrylic: The D1S’s ball-screw motion system and cast-aluminum frame make it easier to achieve stable, usable results with a cleaner surface finish.
Metal: Easel Free is better suited to shallow aluminum engraving and small-area test cuts. It is not the right choice for prolonged deep cutting. To make better use of the D1S’s metal-machining capabilities, explore these advanced workflow guides:
- HiMill D1S + MillMage: Visual machine control and workflow guidance for more advanced metal-machining projects
- HiMill D1S + Vectric VCarve/Aspire: Professional CAM and toolpath workflows for complex projects and small-batch work
5 Free Easel Project Files for HiMill D1S Beginners (DXF + NC)
These five free Easel projects come from the HiMill official library — each one is beginner-friendly and provides DXF + NC files you can load into Easel and run on the D1S.
Free Model 1: Crystal Clear Puzzle Acrylic Pen Holder
- Material: 3mm cast acrylic
- Max size: ≤ 280 × 200 mm (within D1S travel)
- D1S machining time: about 30 minutes (official)
- Pure CNC: the whole piece is cut and milled on the D1S spindle (puzzle-joint structure), no laser step involved
- Key parameters (within D1S limits): 13,000 RPM / 600 mm/min / 1.0mm per pass (don't cut too slow — the acrylic melts and sticks to the bit)
- Includes: Acrylic_Pen_Holder.zip (Google Drive download at the bottom of the page)
- Download Model 1 – Acrylic Pen Holder
- Tutorial page
Free Model 2: Acrylic Cyber Lamp
- Material: 3mm or 5mm clear acrylic + lamp base/bulb
- Max size: ≤ 280 × 200 mm (within D1S travel)
- D1S machining time: about 30 minutes
- Includes: DXF (design file) / NC (D1S G-code, ready to run)
- Download Model 2 – Acrylic Cyber Lamp
- Tutorial page
Free Model 3: Brass Leather Stamp Collection
- Material: 5mm brass (square or round stamps both work)
- Max size: ≤ 280 × 200 mm (within D1S travel)
- D1S machining time: about 0.5 h each (per the case page, per stamp)
- Includes: DXF (design file) / NC (D1S G-code, ready to run)
- Download Model 3 – Brass Leather Stamps
- Tutorial page
Free Model 4: Resin & Acrylic Mosaic Coasters
- Material: 12mm pine board + 3mm colored acrylic + epoxy resin
- Max size: ≤ 280 × 200 mm (within D1S travel)
- D1S machining time: about 6 hours / 4 coasters (not counting resin curing)
- Includes: DXF (design file) / NC (D1S G-code, ready to run)
- Preview: colored acrylic pieces click into the wood like a puzzle, then you pour resin to seal the top — the finished coasters look great in photos.
- Download Model 4 – Mosaic Coasters
- Tutorial page
Free Model 5: Geometric Stepped Aluminum Ashtray
- Material: 6061-T6 aluminum block (example 200×200×25mm)
- Max size: ≤ 280 × 200 mm (within D1S travel)
- D1S machining time: about 48 hours (per the case page)
- Includes: DXF (design file) / NC (D1S G-code, ready to run)
- Preview: layered stepped pockets + chamfers; after sandblasting it looks like an industrial-style desk piece
- Download Model 5 – Aluminum Ashtray
- Tutorial page
Download Summary
| # | Project | Who It's For | D1S Machining Time | Download |
|---|---|---|---|---|
| 1 | Crystal Clear Puzzle Acrylic Pen Holder | Beginners / acrylic assembly | ~30 min / pc | Download Model 1 |
| 2 | Acrylic Cyber Lamp | Beginners / desk decor | ~30 min | Download Model 2 |
| 3 | Brass Leather Stamp Collection | Intermediate metal / leather crafters | ~0.5 h / pc | Download Model 3 |
| 4 | Mosaic Coasters | Wood + acrylic assembly | ~6 h / 4 pcs | Download Model 4 |
| 5 | Geometric Stepped Aluminum Ashtray | Metal showcase / challenge | ~48 h | Download Model 5 |
FAQ
Is Easel Really Free? Does the HiMill D1S Need a Paid Plan?
The free tier (Easel Free) costs nothing but limits your weekly exports / carves; Starter and Pro raise those limits, and Pro also unlocks V-carving and 3D carving. Whether you pay depends on how often you make projects and whether you need 3D / V-carving.
Can Easel Work With Any GRBL Machine? Why Not Directly With the D1S?
Per Easel's official docs, connection depends on the controller. Some machines can live-carve from the browser via Easel's Local Machine Connection; others — including the D1S — work better with exported G-code run in the machine's own software (MaxmakeLAB on the D1S).
Can Easel Cut Aluminum or Metal on the HiMill D1S?
You can do shallow aluminum work / engraving / small test cuts, but Easel Free is not a good fit for deep, production-style cuts — its workflow and tuning options are more limited than advanced CAM software. For serious aluminum, check the MillMage / Vectric articles.
I Have Lots of X‑Carve Easel Projects — Will They Be Wasted on the D1S?
No. As long as the finished size fits within the D1S's 280×200×80mm travel, most projects can be reused: open the original project, check the dimensions and cut parameters, re-export the NC, and run it in MaxmakeLAB.
Does Easel Work With the D1S's Stepper Motors?
Yes. Easel works at the G-code level, so it doesn't care what kind of stepper motors your machine uses. The D1S uses open-loop steppers, which are standard for desktop CNCs and more than adequate at this size — just stay within the recommended parameters in this guide, and the setup workflow is exactly the same.
Summary
To sum up, three things matter:
- ① Yes — Easel CNC software works with the HiMill D1S: follow the step-by-step setup at the top and you can run the whole process.
- ② For beginners / education / makerspaces, Easel Free is a great starting point (with its weekly limits), and the 5 free projects at the end are ready to practice with.
- ③ If you're coming from X‑Carve, as long as your project fits within 280×200, reuse is cheap.
Once you're comfortable and want more stable metal cutting or more complex 2.5D / 3D work, jump straight to the other two articles: HiMill D1S + MillMage (advanced machine control) and HiMill D1S + Vectric VCarve/Aspire (professional toolpath generation).
HiMill D1 Desktop CNC Machine
Connect with the MAXMAKE community
Share your projects, discover new ideas, and connect with other makers.
Join Our Community
Share projects, ask questions, connect with makers