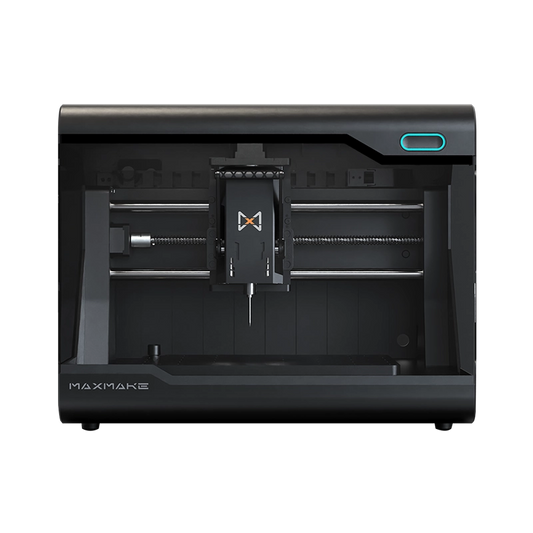
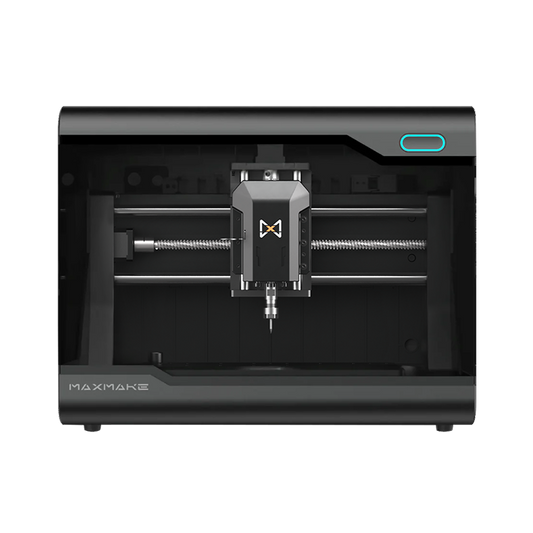
Vectric VCarve & Aspire Tutorial: HiMill D1S Setup (Free 3D Models)
Looking for a complete Vectric VCarve setup for your HiMill D1S? This guide takes you through a proven VCarve Pro and Aspire workflow for the D1S — from first setup to finished part — and it includes free 3D models you can download and run today.
The 3 Files & Resources You’ll Get
To help you finish your software setup and export your first ready-to-run NC file in about 15 minutes, this article includes these free downloads:
- Official post processor: the HiMill D1S post processor file.
- 6-step setup template: tuned to the D1S work area (280×200 mm).
- First-run projects: 5 free project files from the HiMill D1S official case library (DXF + NC). NC files can be imported into MaxmakeLAB directly; to resize or edit text, open the DXF in VCarve/Aspire and re-generate toolpaths with the workflow in this article.
HiMill D1S Compatible with VCarve Pro: Full Vectric Compatibility
The short answer: HiMill D1S can run G-code exported from Vectric VCarve Pro and Aspire directly: no machine configuration to build by hand, no firmware to flash, and no custom scripts to debug.
Compatibility highlights (for anyone deciding whether the D1S works with VCarve):
- VCarve Pro ✅ / Aspire ✅ (plus more tools in the Vectric ecosystem)
- Output: G-code (commonly .nc / .tap) → runs on the D1S
- Key point: using the HiMill D1S dedicated post processor makes setup even easier
VCarve Pro Tutorial for Beginners: What Are VCarve & Aspire?
Vectric is close to the default choice among desktop CNC users, and for good reason: its 2D/2.5D workflows are mature and dependable. You don’t need to spend hours wrestling with CAM logic to turn a design into clean, usable G-code.
- VCarve Pro: the industry-standard 2D/2.5D option (profiles, pockets, V-carving, and complete common workflows)
- Aspire: adds full 3D capability on top of VCarve (better for 3D model machining and complex reliefs)
If your goal is to get up and running quickly and start making things, Vectric’s learning curve is usually friendlier than the alternatives.
HiMill D1S VCarve Setup in 6 Steps
The example below creates a 3D relief from a grayscale image and walks through modeling, toolpath generation, G-code export, and machining on MaxmakeLAB.
1) New Job: Lock Down Your Stock and Origin
- Create a new job and choose stock size, XY origin, and Z0 (top or bottom of the material).
- Keep the job size within the D1S travel: 280 × 200 × 80 mm, or you’ll hit the machine’s limits later.

2) Import Bitmap: Size and Position
- Import your bitmap and scale it to the finished size you want, then place it in the right position.
- The image size sets both the part size and the machining time.

3) Create Model from Image: Keep Height Below Stock
- Create a component from the bitmap (Create Component from Bitmap / Create Model from Image).
- Set the relief height in 3D view: the highest point must stay below the stock thickness — this is where most people cut through their material.

4) Roughing: Remove Material, Keep Some Allowance
- Choose the 3D Roughing Toolpath, pick a tool, and fill in the basics (spindle speed, feed, plunge, stepover).
- Use Model Boundary for the machining boundary and keep a small allowance for finishing.
- Run the simulation immediately to confirm you won’t over-travel, cut through, or hit the clamps.


5) Finishing: Tune with the Simulation
- Choose the 3D Finishing Toolpath; parameters are similar to roughing, but stepover matters most.
- A smaller stepover gives a finer surface but takes longer — compare directly in the simulation.


6) Export G-code: Always Select the D1S Post Processor in Save Toolpath(s)
- Don’t use File → Save to export; the correct entry point is Toolpaths → Save Toolpath(s).
- Select the HiMill D1S dedicated post processor (.pp) here — this is the step where first-timers fail most often.
- Rough and finish: if you want one file, select both toolpaths and export together; if not, export Rough.nc / Finish.nc separately and run them in order in MaxmakeLAB.
- (Screenshot: the Save Toolpath(s) dialog, with the Postprocessor dropdown and toolpath selections highlighted)

Machining (MaxmakeLAB)
- After importing G-code, follow this order: install the first tool → set Z height / touch off → set the origin → start.
- When roughing finishes, swap tools as prompted and run finishing.

30-Second Checklist
- Job Size ≤ 280×200×80 mm
- Simulated rough and finish toolpaths: no over-travel, no cut-through, no clamp collisions
- Selected the HiMill D1S Post (.pp) when exporting in Save Toolpath(s)
- MaxmakeLAB: tool first → touch off → set zero
- Air cut first run for extra safety
VCarve vs Aspire: Which One Do You Need for HiMill D1S?
| Dimension | VCarve Pro | Aspire | Recommendation for D1S users |
|---|---|---|---|
| 2D profile cutting / drilling / pocketing | ✅ Full support | ✅ Full support | Either works |
| 2.5D (V-Carving / chamfering / general engraving) | ✅ Full support | ✅ Full support | Either works |
| 3D machining (3D roughing + finishing toolpaths) | ✅ Supported (incl. 3D Roughing & Finishing) | ✅ Supported | Both can do 3D toolpaths; the real difference is 3D modeling capability |
| 3D file import (STL/OBJ/3DM...) | ✅ Common 3D formats supported | ✅ Common 3D formats supported | If you have ready-made STL or scanned models: VCarve is enough |
| 3D modeling / sculpting tools (building models inside the software) | ❌ Basically none (mostly toolpaths) | ✅ Aspire's core strength | Need reliefs or complex textures built in software: choose Aspire |
| Rotary axis (Wrapped Rotary) | ✅ Supports Wrapped Rotary toolpaths & post processors | ✅ Supports Wrapped Rotary toolpaths & post processors | Planning a rotary axis: both work (wrapped style; not full 4-axis simultaneous) |
| Price (USD, typical license / retail reference) | ~$699 | ~$1,995 | Budget-sensitive: start with VCarve; upgrade to Aspire when you need 3D modeling |
| Learning curve | Gentler | Steeper | Beginners usually find VCarve easier |
| Typical D1S use cases | Aluminum sheet cutting / nameplates / acrylic parts / simple 3D carving | 3D metal stamps / complex reliefs / jobs that need in-software modeling | Decide whether you are "making toolpaths" or "making models" |
Bottom line
For most HiMill D1S users — mainly 2D/2.5D work in aluminum sheet, acrylic, and wood, plus importing STL for 3D toolpaths — VCarve Pro is usually enough. Aspire only pays off when you genuinely need richer 3D relief creation, component carving, and textures inside the software. The good news is that Vectric lets you upgrade between tiers by paying just the price difference. One more thing: you’ll also see Cut3D and PhotoVCarve in the Vectric family — Cut3D is a standalone tool for 3D machining, and PhotoVCarve focuses on grayscale photo reliefs — but VCarve Pro and Aspire are the two main all-in-one options.
Best Vectric Settings for Aluminum: Feeds & Speeds for HiMill D1S
How to Use These Parameters
The parameters below are based on the HiMill D1S official specs: 250W brushless air-cooled spindle, 0–13,000 RPM, travel 280×200×80 mm. These are safe starting values: start at 70% of the listed feed on your first test cut, and increase only after chip removal, sound, and surface quality are stable.
Parameters for 3 Common Materials (Suggested Values)
| Material | Tool type | Tool diameter | Spindle speed S (RPM) | Feed rate F (mm/min) | Depth of cut ap (mm/layer) | Width of cut ae (mm) |
|---|---|---|---|---|---|---|
| 6061 / 7075 Aluminum | 3-flute carbide end mill (small-diameter metal bit) | 3.175 mm | 13,000 | 100 – 200 | 0.1 – 0.3 | 0.8 – 1.6 (~25–50% D) |
| 6061 / 7075 Aluminum | 3-flute carbide end mill | 6 mm | 13,000 | 150 – 250 (start from the low end) | 0.2 – 0.4 (conservative first) | 1.5 – 3.0 (~25–50% D) |
| Acrylic (PMMA) | Single-flute O-flute spiral bit | 3.175 mm | 13,000 | 600 – 800 | 0.5 – 1.0 | 1.6 – 2.5 (~50–80% D) |
| MDF / Hardwood | 2-flute flat end mill (pocket / profile) | 3.175 mm | 13,000 | 800 – 1,000 | 1.0 – 2.0 (conservative for hardwood) | 1.6 – 2.5 (~50–80% D) |
Rule of thumb: test each row at 70% feed first.
For example, in the aluminum 3.175mm row, F=100–200, so start at 70–140 mm/min and increase once stable.
Summary
Looking at the two aluminum rows, you can see that D1S aluminum machining isn’t about cranking the feed as high as it will go — it’s about a stiffer machine letting you run a dependable depth of cut with stable chip removal (the official aluminum parameters also call for lubrication and strong air blast). Many 3018-class machines need far more conservative depth and feed for aluminum, or they chatter and smear. Treat these values as D1S-class settings, not something to copy onto lighter machines.
Free HiMill D1S Project Files: 5 Ready-to-Run NC Downloads (DXF + NC, some include STL)
All 5 projects below come from the HiMill D1S official case library. Each download includes NC G-code (ready to run in MaxmakeLAB) and a DXF source file (editable in VCarve/Aspire). Selected 3D relief projects may also include STL/3D assets, depending on the case pack.
Free Model 1: Crystal Clear Puzzle Acrylic Pen Holder (2D-2.5D)
- Material: 3mm high-clarity Cast Acrylic
- Fits within: ≤ 280 × 200 mm (within D1S travel; no resizing needed by default)
- D1S machining time: ~30 minutes
- Included: DXF + NC
- Preview: a see-through acrylic pen holder with puzzle-joint pieces that snap together and clear, polished edges — an ideal “first cut” test piece
- Download: Download Model 1 – Acrylic Puzzle Pen Holder; Tutorial page
Free Model 2: Rotating Hexagon Wood Desk Organizer (2.5D)
- Material: walnut (dark layers) + beech (light layers) (thickness per the case recommendation)
- Fits within: ≤ 280 × 200 mm (within D1S travel; no resizing needed by default)
- D1S machining time: ~2 hours
- Included: DXF + NC
- Preview: stacked geometric layers in dark walnut and light beech; each layer spins independently on a central axle, like a desktop stacking-block toy
- Download: Download Model 2 – Rotating Hexagon Organizer; Tutorial page
Free Model 3: 3D Tiger Relief Cookie Mold (3D Relief)
- Material: ~20mm beech
- Fits within: ≤ 280 × 200 mm (within D1S travel; no resizing needed by default)
- D1S machining time: ~3 hours
- Included: DXF + NC (may include STL)
- Preview: an intaglio tiger-relief mold; the fur detail comes out crisp after finishing — a great project for practicing the full rough-to-finish workflow
- Download: Download Model 3 – 3D Tiger Cookie Mold; Tutorial page
Free Model 4: “Hello Easter” Bunny Ear Wooden Basket (CNC + Laser)
- Material: 3mm basswood plywood + cotton rope + pompoms
- Fits within: ≤ 280 × 200 mm (within D1S travel; no resizing needed by default)
- D1S machining time: ~60 min machining + ~5 min assembly
- Included: DXF + NC + LightBurn file (laser outer contour)
- Preview: V-Carve lettering on the side panels with laser-cut profiles — a neat way to see one D1S handling both CNC and laser work
- Download: Download Model 4 – Bunny Basket Project Files; Tutorial page
Free Model 5: 6061 Aluminum Bull Skull (3D Relief)
- Material: 3mm 6061-T6 aluminum sheet
- Fits within: ≤ 280 × 200 mm (within D1S travel; no resizing needed by default)
- D1S machining time: ~1 hour
- Included: DXF + NC (may include STL)
- Preview: an aluminum 3D relief bull skull; roughing clears material fast, then finishing with a ball-nose bit brings out the detail — a great showpiece for what the D1S can do in aluminum
- Download: Download Model 5 – 6061 Aluminum Bull Skull; Tutorial page
| # | Project | Software | D1S Machining Time | Download |
|---|---|---|---|---|
| 1 | Acrylic Puzzle Pen Holder | VCarve / Aspire | ~30 min | Download |
| 2 | Rotating Hexagon Organizer | VCarve / Aspire | ~2 hrs | Download |
| 3 | 3D Tiger Cookie Mold | VCarve / Aspire (3D) | ~3 hrs | Download |
| 4 | Bunny Ear Wooden Basket | VCarve / Aspire + LightBurn | ~60 min + assembly | Download |
| 5 | 6061 Aluminum Bull Skull | VCarve / Aspire (3D) | ~1 hr | Download |
Install D1S Post Processor: VCarve & Aspire Post Processor Setup
Aside from Machine Configuration → Import Post, Vectric’s official way to install and select a third-party .pp post processor is:
- Use Vectric’s “Install Post Processor” feature to install the third-party .pp (recommended by Vectric)
- The key entry point to select the post processor is the Save Toolpath(s) export dialog (not the normal save-project command)
FAQ: VCarve, Aspire & HiMill D1S Post Processor Questions
How do I install the HiMill D1S post processor in VCarve?
Use Vectric’s “Install Post Processor” feature to add the HiMill D1S .pp file, then select it in the Save Toolpath(s) dialog. See the “Install D1S Post Processor” section above for details.
Is VCarve free for HiMill D1S? Can I use a trial version?
VCarve and Aspire are paid software, but Vectric offers an official trial. We recommend running through this setup and cutting a test piece on the trial before you decide what to buy.
Which HiMill D1S post processor should I choose in VCarve / Aspire?
Go with the HiMill D1S dedicated post processor (see the install section above). A generic GRBL post processor also works, but it’s more likely to cause minor issues on your first test cut — which is exactly why the D1S ships with a ready-made Vectric post processor.
What are the best VCarve feeds and speeds for 6061 aluminum on HiMill D1S?
A single-flute aluminum end mill is usually your best bet (better chip removal). Use the Feeds & Speeds table in this article, starting at 70% of the listed feed. For 3D carving projects, go with a ball-nose bit.
Can VCarve Aspire do 4th axis on HiMill D1S?
That depends on whether your D1S is set up with a 4th axis and how it’s supported. Aspire can generate the corresponding toolpaths, but whether the machine itself supports a 4th-axis expansion, and how it connects, should be confirmed on the product page or with technical support.
Where can I download HiMill D1S Vectric files?
All 5 free D1S project files are listed in the “Free HiMill D1S Project Files” section above — each download includes DXF + NC; selected 3D relief projects may also include STL.
Conclusion: From Idea to Finished Part
In short, the HiMill D1S and professional Vectric VCarve Pro & Aspire software are fully compatible. Follow the 6-step setup and install the D1S post processor, and you’ve closed the whole loop from design to MaxmakeLAB machining. The 5 free 3D models at the end of this article are ready to run, so you can keep test costs low and get to your first real cut faster.
For makers looking for a desktop CNC that works with VCarve Pro, the D1S has everything covered: post processor, performance parameters, and real project files. You won’t waste time wrestling with software or debugging code; you can get straight to work. Click below to grab the resource pack and start making on your D1S today.
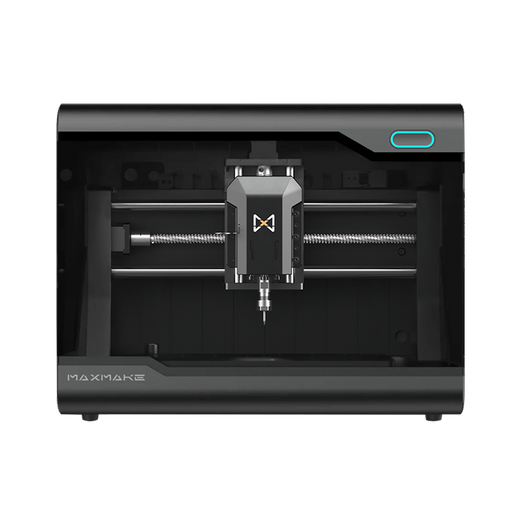
HiMill D1 Desktop CNC Machine
Connect with the MAXMAKE community
Share your projects, discover new ideas, and connect with other makers.
Join Our Community
Share projects, ask questions, connect with makers