[Desktop CNC Aesthetics] Brighten Up Your Desk! Making Crystal-Clear Acrylic Flowers with HiMill D1S 🌷✨
![[Desktop CNC Aesthetics] Brighten Up Your Desk! Making Crystal-Clear Acrylic Flowers with HiMill D1S 🌷✨](http://maxmake.com/cdn/shop/articles/himill-d1s-cnc-acrylic-flower-sculpture_31536cff-498b-4128-9e3f-dc9f982b54c5_1100x.webp?v=1779681942)
Fresh flowers fade, but art lasts forever. How do you use rigid CNC machining to capture the delicate, organic feel of plants? Today, we're leveraging the high-precision cutting capabilities of the HiMill D1S desktop CNC to transform multi-colored acrylic sheets into a set of "everlasting" art sculptures. Through precise interlocking design, let's instantly fill your desktop with multi-dimensional, colorful aesthetics!
🛠️ Project Overview
- Project Name DIY Acrylic Preserved Flower Art Sculpture
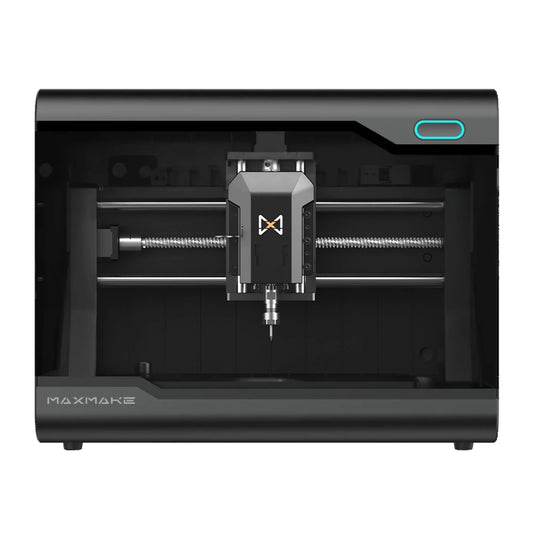
- Equipment Used HiMill D1S Desktop CNC (Spindle Milling Mode)
- Materials List 3mm thick multi-color Acrylic Sheets (Frosted Translucent Blue, Solid Red, Lemon Yellow, Translucent Green, Clear)
- Applications Desktop Decor, Light & Shadow Art, Creative Gifts
- Difficulty Level ★★★☆☆ (Intermediate. Involves tolerance control for multi-part interlocking joinery)
🎨 Phase 1: Prep & Design
For a modular art piece like this, precise design is the key to a successful assembly.
1. Prep & Design
- Materials: 3mm acrylic sheet series.
- Tooling: The absolute essential 1.5mm Single Flute Spiral End Mill (Single flutes offer superb chip evacuation, preventing scorching or melting).
Never use a 2-flute bit for cutting plastics and acrylics! A single flute end mill has a larger chip gullet, quickly evacuating chips and carrying heat away with them. It's the absolute holy grail for preventing acrylic from melting and gumming up the bit.
Design Key Points:
- Joint Compensation (Tolerance): Acrylic sheets usually have positive/negative thickness tolerances. When designing slots, we highly recommend leaving a 0.1mm - 0.15mm gap wider than the actual board thickness (e.g., for a 3mm board, design the slot width at 3.15mm).
- Form Logic: Modular design divided into three main components: "Vase Base", "Long-Stem Flowers", and "Leaves".

⚙️ Phase 2: CAM Settings
The biggest fears when machining acrylic are "gumming up the bit" (chip welding) and "edge chipping". The stability of the HiMill D1S truly shines here. Copy these parameters:
- Spindle Speed: 13,000 RPM — High speed ensures a pristine surface finish.
- Cutting Feed Rate (XY): 600 mm/min — Can be fine-tuned between 500-800 mm/min depending on specific acrylic hardness.
- Plunge Feed Rate (Z): 600 mm/min.
- Step Down (Depth per Pass): 1 mm — The "shallow cut, fast feed" strategy.
- Machining Strategy: It is recommended to use "Outside Profile Cutting" and enable "Ramping / Smooth Lead-in" to minimize visible plunge marks.

⚙️ Phase 3: Machining (Let the Chips Fly)
- Workholding & Zeroing: Secure the acrylic sheet (pre-applied with double-sided tape) to the machine bed. Use an edge finder or manual zeroing to set the work origin at the center or top-left corner (matching your CAM setup).
- Safety Check: Ensure the machine enclosure is closed and the air assist/blow line is clear.
- Start Cutting: Hit start on the HiMill D1S. Accompanied by a crisp cutting sound, the 1.5mm single-flute end mill glides across the acrylic like a paintbrush. Thanks to the dialed-in parameters and air assist, the evacuated waste is dry, white powder/chips, not a melted, gummy mess.

🧩 Phase 4: Post-Processing & Assembly
Once all parts are off the machine, it's time for the most satisfying part!
- Minimal Deburring: Although the cut edges are already very smooth, for a better feel, use 400-grit fine sandpaper to gently scuff around the edges, knocking down any sharp micro-burrs.
- The Peeling Ceremony: Peel off the protective film from both sides! Instantly, the dull parts become crystal clear with highly saturated colors.
-
3D Assembly:
- The brilliance of this design lies in its "interlocking joinery".
- First, assemble the blue base into a 3D vase using the pre-milled slots.
- Next, insert the clear flower stems, green Monstera leaves, red tulips, and yellow stars into the base grid in a staggered, aesthetic arrangement according to the blueprint.

🌈 The Result: The Art of Capturing Light and Shadow
When light passes through the differently colored acrylics:
- Translucent Blue Base: Creates a stunning visual illusion of "water".
- Color Blocking: The overlapping red and green blocks cast vibrant, rainbow-like shadows on the desk.
- Minimalist Lines: Perfectly embodies the structural beauty of industrial machining combined with organic plant forms.

📊 HiMill D1S User Insights:
This build once again validates the HiMill D1S's advantages in acrylic machining:
- Edge Precision: The surface finish of the cut edges is exceptionally high, eliminating the need for tedious polishing steps (like flame polishing).
- Small-Part Friendly: Even the tiny interlocking slots on the petals are accurately reproduced, ensuring a snug fit—not too loose, not too tight.
What kind of flowers would you design for your desk? A minimalist solid color theme, or a bold color-blocking style like mine? Let's discuss your ideas in the comments, or click below to download my design files and make one yourself!
📥 File Download
Shared via Cloud Drive: Acrylic Preserved Flowers Project Files
[DOWNLOAD LINK] Google Drive