[Easter Special] 3 Cute Bunny Woodworking Projects using HiMill D1S CNC & Laser 🐰🥚
![[Easter Special] 3 Cute Bunny Woodworking Projects using HiMill D1S CNC & Laser 🐰🥚](http://maxmake.com/cdn/shop/articles/BLOG_TUTORIAL_MAKE_THESE3_EASTER_WOOD_PROJECTSSTEP-BY-STEP_GUIDES_TEMPLATES_0a55d732-2484-492e-af3d-acca30c881d2_1100x.webp?v=1779681897)
Spring Easter is not just about hunting for eggs; it's the perfect opportunity to upgrade your desktop workshop. In this tutorial, we'll unlock three whimsical and unique Easter woodworking projects in one go: the "Hello Easter" Bunny Basket, the Outdoor Picnic Strip Crate, and the Bunny Egg Holder. Utilizing the powerful performance of the HiMill D1S Desktop Multifunction Machine (CNC + Laser Module), we'll transform plain wooden boards into design-forward holiday pieces. Whether for personal use or as a thoughtful gift, this step-by-step guide will help you master desktop manufacturing.
🛠️ Project Overview
- Project Name: Easter Bunny Trio Series
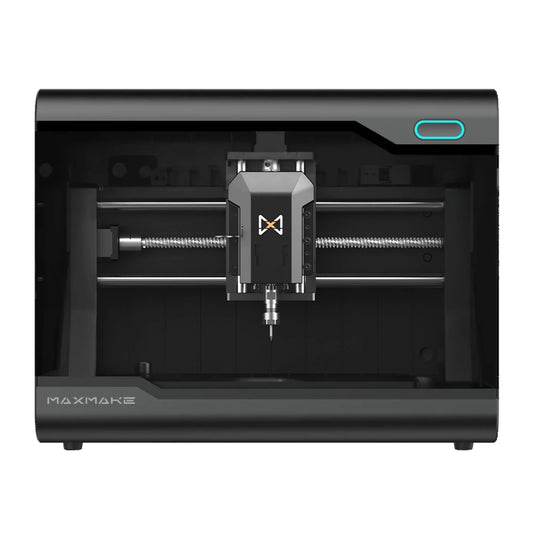
- Equipment Used: Marxmake HiMill D1 / D1S Desktop Multifunction Machine
- Difficulty Level: ★★★☆☆ (Intermediate. Involves laser/CNC dual-mode switching and thick material processing)
Materials List:
-
Project 1 (Bunny Basket): 3mm Basswood Plywood, Thick Cotton Rope, White Pom-pom (Tail decoration)

-
Project 2 (Picnic Crate): 8mm / 10mm Basswood Plywood, 20mm Diameter Round Wooden Dowel

-
Project 3 (Egg Holder): 20mm Solid Beech Wood Board, 8mm Basswood Plywood

🎨 Phase 1: Design Concept & Preparation (Prep & Design)
These three projects represent three core logics in desktop manufacturing:
- Project 1 (Bunny Basket): Focuses on the combination of "Laser Engraving + CNC Cutting". Uses the laser for delicate facial expressions, CNC for efficient profile cutting, and adds mixed materials like cotton rope and a pom-pom to enhance the fun factor.
- Project 2 (Picnic Strip Crate): Focuses on "Structural Joinery". Utilizes round holes in the side panels and wooden dowels for physical pass-through, creating a slatted fence effect, suitable for large-area, high-efficiency cutting.
- Project 3 (Bunny Egg Holder): Focuses on "Thick Material Processing & Versatility". Precisely mills egg slots into a 20mm thick solid wood board, challenging the machine's deep processing stability.
⚙️ Phase 2: Machining Parameter Recommendations (CAM Settings)
To achieve the best cutting results, it is recommended to set the following parameters for different modes:
1. CNC Machining Parameters (Spindle Mode):
- Tool Selection: 0.3mm Flat Bottom Engraving Bit (for text outlining), 3.175mm Single Flute Spiral End Mill (for profile cutting and pocketing).
- Spindle Speed: 13,000 RPM (Maintain high speed to ensure smooth edges).
- Feed Rate: 800 mm/min (XY axis movement), 500 - 600 mm/min (Z-axis plunge).
- Stepdown (Depth per pass): 1.0mm (Can be fine-tuned based on material hardness).
- Workholding: Double-sided tape + Clamps, to prevent displacement when cutting thick materials.

2. Laser Machining Parameters (Laser Mode - For Project 1):
- Facial Features Engraving: Speed 10 mm/s, Power 25% (Fill Mode).
- "Hello" Text & Patterns: Speed 30 mm/s, Power 25% (Fill Mode).

- Outer Profile Cutting: Speed 4 mm/s, Power 100% (Line Mode).
🧩 Phase 3: Step-by-Step Guide
1. Project 1: "Hello Easter" Bunny Basket
- Steps: First, use the 0.3mm engraving bit to outline the text edges. Then, utilize the quick-swap design to install the laser module to complete the facial features and floral pattern engraving. Finally, perform the outer profile cutting with the laser.
- Assembly: Thread the thick cotton rope through the pre-cut holes in the ears and attach the white pom-pom to the tail area.

2. Project 2: Picnic Strip Crate (Egg Rack)
- Steps: Cut the two side bunny silhouette panels and precisely mill out the 20mm round holes. The bottom features a slatted strip design.
- Assembly: The round wooden dowel passes through the side panels, acting as both a handle and reinforcement. It is recommended to apply a coat of wood wax oil to showcase the natural wood grain.

3. Project 3: Bunny Egg Holder
- Steps: On the 20mm thick board, first machine out 4 hemispherical egg slots, then switch to the 3.175mm end mill to cut out the main bunny body.
- Finishing: Sand the entire piece until smooth and rounded. Place colorful eggs in the front slots for a festive atmosphere.

🌈 Final Showcase (The Result)

📊 HiMill D1S User Insights:
- Precision Assurance: The HiMill D1S remains powerful even when processing 20mm thick solid wood boards, resulting in extremely clean cut edges that require only minimal sanding.
- Versatility: One machine handles laser filling, CNC outlining, and thick material drilling. This "Bunny Trio" perfectly demonstrates the infinite possibilities of a desktop factory.
📥 File Download
[Easter Special Design Pack]: Contains DXF/NC vector files for all three projects mentioned above.
Download Project Files