[CNC & Laser Project] Satisfying Build: "Perpetual Woodpecker" Kinetic Art with HiMill D1S 🌳🐦
![[CNC & Laser Project] Satisfying Build: "Perpetual Woodpecker" Kinetic Art with HiMill D1S 🌳🐦](http://maxmake.com/cdn/shop/articles/himill-d1s-cnc-laser-kinetic-woodpecker-sculpture_c2d4d4b3-a6fe-4c2d-af25-8043b2a1e26c_1100x.webp?v=1779681982)
Feeling like your desk setup is a bit dull? Let's add some "life" to it! Today, I'm using the HiMill D1S Desktop Machining Center to build a super-satisfying piece of kinetic art—the Perpetual Motion Woodpecker. In this project, we'll use the CNC spindle to mill a solid, heavy base, and then swap in the laser module for precision cutting of the house and bird. I even made two versions: a "Pure Natural Wood" edition and a "Dopamine Painted" edition. Check out this hardcore parameter tutorial and get hands-on this weekend!
🌟 I. Project Overview
- Project Name: Satisfying Woodpecker Kinetic Art Sculpture
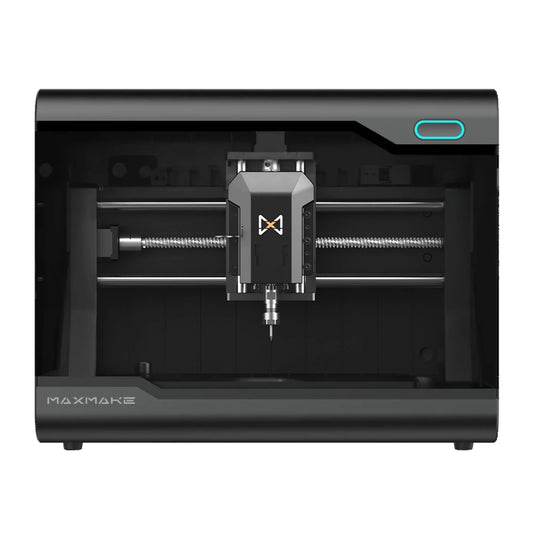
- Equipment Used: HiMill D1S Desktop CNC (Utilizing both Spindle Milling + 10W Laser Cutting modes)
- Interactive Play: Give the woodpecker a nudge, and it automatically descends the guide pole with a rhythmic "peck-peck-peck" motion—incredibly satisfying!
- Difficulty Level: ⭐⭐⭐ (Intermediate. Involves two machining processes and kinetic assembly)
- Cycle Time: Approx. 1.5 Hours
- Style Showcase: Minimalist Natural Wood vs. Hand-Painted Dopamine Style

🛠️ II. Preparation: Materials & Core Tools
To ensure a stable base and lightweight dynamic parts, we're using different thicknesses and types of wood.
1. Material Preparation:
- Thick Stock (Base): 20mm thick Sandalwood block (Provides a stable center of gravity).
- Thin Stock (House/Tree/Bird): 3mm thick Basswood Plywood + 3mm thick Beech Plywood.
- Accessories: Rocker mechanism (acts as the woodpecker's movement track), Wood glue.
2. Tooling & Module Preparation:
- CNC Milling Tools: 3.175mm Single Flute Spiral End Mill (Main roughing/cutting), 2.5mm Ball Nose Mill, 1.5mm Single Flute Spiral End Mill (Fine detailing).
- Laser Module: HiMill D1S dedicated 10W Blue Light Laser Module.

💻 III. Step 1: CNC Milling the Solid Base
First, we use the CNC spindle mode to machine the 20mm thick base. Thick stock requires milling to ensure precise depth and vertical edges.
1. Pre-Machining Setup:
Use clamps to securely fixture the 20mm wood block onto the bed. Use an edge finder or manual zeroing to set the work origin at the center or top-left corner of the material (matching your NC file).
2. Core CNC Parameters (Tested & Proven Data - Copy directly):
- Spindle Speed: 13,000 RPM
- Cutting Feed Rate (XY): 800 mm/min
- Plunge Feed Rate (Z): 800 mm/min
- Step Down (Depth per Pass): 1 mm (Aim for stability over speed to ensure smooth base walls)
- Stepover (XY): 1.5mm (Roughing) / 0.1mm (Ball Nose Finishing) / 1.5mm
- Chip Evacuation: No coolant needed for cutting wood on a desktop CNC, but we recommend using the included magnetic brush to clear chips.

💥 IV. Step 2: Precision Laser Cutting House & Bird
Once the base is done, utilize the HiMill D1S's quick-swap design to directly install the laser module. For processing 3mm thin stock, complex tree canopies, and fine woodpecker profiles, laser cutting offers far superior efficiency and precision compared to milling.
Based on testing, Basswood is softer, while Beech is harder. Therefore, laser parameters for both must be set differently to ensure a clean cut-through in one pass with nice edges:
-
Cutting 3mm Basswood (Softer):
- Speed: 5 mm/s
- Power: 90%
-
Cutting 3mm Beech (Harder):
- Speed: 3 mm/s (Slower speed)
- Power: 95% (Higher power)
Accompanied by a faint scent of burnt wood, the windows of the house, the outlines of the leaves, and the bird's body are precisely cut out.

🎨 V. Step 3: Post-Processing, Painting & Assembly
After all parts are off the machine, it's time to give them "soul"!
1. Minimal Deburring:
Use 400-grit sandpaper to gently scuff all edges and engraved areas. Due to the high precision of the HiMill D1S, this step only requires minor attention to sharp corners.
2. Style Differentiation (Natural vs. Painted):
- Natural Wood Version: Keep the natural wood grain. Apply only a layer of clear wood wax oil for protection, showcasing a minimalist Nordic style.
- Painted Version: Bring out the acrylic paints! Paint the big tree a vibrant green, give the house white walls and an orange roof, and add lively colors to the woodpecker.
3. Kinetic Assembly:
- Use wood glue to insert and secure the tree and house into the pre-milled slots on the base.
- The Most Important Step: Install the guide pole next to the tree trunk and thread the woodpecker's collar onto the pole. Check the claw details and friction against the design drawings.
- Test: Push the woodpecker to the very top and let go. If it rhythmically slides down with a crisp "peck-peck-peck" sound and a jerky motion, congratulations—a perfect kinetic structure is born!

🎉 VI. Project Conclusion
Look at these two completed sculptures! The natural wood version is calm and versatile, while the painted version is full of childlike fun.
This project gave me a profound appreciation for the powerful expandability of the HiMill D1S as a "Desktop Machining Center." The CNC milling ensured structural rigidity for the thick base, while laser cutting boosted efficiency and sharpness for fine, thin parts. One machine, bridging the entire process from structural components to artistic crafts.
When you're tired from work, flicking this little woodpecker and watching it labor with mechanical rhythm is truly pure "Satisfying." The design files are below—go start your desktop woodworking journey!

📥 File Download
Want to run these on your machine? Get the full pack of project files via Google Drive.
[DOWNLOAD LINK] Google Drive