


Never Lose a Bit Again! Build a Tiered Wooden CNC Tool Organizer with HiMill D1S 🛠️

Every CNC hobbyist needs a neat tool organizer on their desk. Learn how to transform a solid wood board into a tiered, aesthetic, and practical tool holder that fits both cased and bare bits!
Tired of searching through a messy drawer for the right end mill? Today, I'm sharing how to use the MAXMAKE HiMill D1S desktop CNC to machine a beautiful, tiered solid wood tool organizer. It not only neatly stores standard end mills in their plastic cases but also has dedicated slots for bare bits. Say goodbye to a cluttered workbench! Read to the end for a hardcore guide on avoiding tear-out and burn marks when machining solid wood.
🛠️ I. Project Overview
- Project Name Tiered CNC Tool Holder Organizer
- Equipment Used HiMill D1S Desktop CNC
- Core Processes Tiered Pocketing + Profile Cutting + Counterboring
- Features Holds 12 cased bits + 12 bare bits + Anti-slip base
- Difficulty Level ⭐⭐ (Beginner-friendly, focuses on basic solid wood parameters)
- Cycle Time Approx. 5 Hours
- Main Material 10mm Basswood (or hardwoods like Walnut, Maple)
📋 II. Preparation: Materials & Tooling
If you want to machine solid wood without edge tear-out or burn marks, your tooling and workholding are the key.
1. Hardware & Materials (BOM):
- Stock: 10mm thick Basswood board (Hardwoods offer great texture, resist warping, and engrave beautifully).
- Accessories: 3mm anti-slip silicone pads (Optional, attach to the bottom to prevent sliding).
- Workholding: Woodworking toe clamps.
2. Tooling Recommendations (For Solid Wood):
-
Profile Cutting & Pocketing: 3.175mm Single Flute Spiral End Mill.
Reason: Single flute offers smooth chip evacuation, preventing wood from burning and leaving a clean finish. - Outer Profile / Holes: Flat bottom counterbore (or use the 3.175mm end mill with a helical toolpath).
Always use a Single Flute Spiral End Mill when machining solid wood. It dramatically reduces edge tear-out compared to 2-flute bits!

💻 III. Design & CAM Strategy
This design balances both aesthetics and practicality:
-
Functional Zoning:
- Top Tier: 12 square pockets (Sized for standard end mill plastic cases, approx. 13x13x18mm deep).
- Bottom Tier: 12 round counterbore holes (4mm & 3.2mm diameters, 18mm deep, for bare bits).
- Edges: Filleted corners (R15mm) to prevent sharp edges and improve the tactile feel.
CAM Pitfall Avoidance (HiMill D1S Parameters)
The biggest fears when cutting solid wood are "tear-out" and "burnt bits". Here are the exact settings you need:
-
Tiered Pocketing (Square Slots):
- Step Down (Depth per Pass): 0.5mm
- Spindle Speed: 13,000 RPM
- Feed Rate: 600 mm/min
- Strategy: Climb Milling (This is crucial for significantly reducing edge tear-out).
-
Outer Profile & Bare Bit Holes:
- Strategy: Helical Milling (Much smoother and safer than direct vertical plunging/drilling).
- Spindle Speed: 13,000 RPM
- Feed Rate: 600 mm/min
-
Final Profile Cutting:
- Spindle Speed: 13,000 RPM
- Feed Rate: 600 mm/min
- Stock to Leave: Leave 0.1mm for a final Finishing Pass.
- Key: Always use climb milling for the final profile cut and ensure your bit is razor-sharp!
-
Chamfering:
- Tool: 4mm Chamfer Bit
- Spindle Speed: 13,000 RPM
- Effective Cutting Diameter: 20mm

⚙️ IV. CNC Machining Process
The powerful spindle of the HiMill D1S handles solid wood effortlessly. Watching the wood chips fly out evenly is extremely satisfying.
- Workholding: Secure the stock firmly with woodworking clamps. Note: Solid wood machining can generate vibration; double fixing prevents the stock from shifting.
-
Machining Sequence:
- First, machine the outer profile and the stepped tiers.
- Second, machine all square pockets and round counterbore holes.
- Third, chamfer the outer edges.
- Finally, perform the full outer profile cut to release the part.
Note: Remember to clear wood chips promptly during the process to prevent buildup, which can affect machining precision.

🎨 V. Post-Processing & Finishing
This is the crucial step to elevate the texture of your project!
- Part Removal: Carefully remove the machined organizer and brush off the surface dust.
- Sanding: Rough sand with 180-grit sandpaper, then fine sand all surfaces and edges (especially the fillets) with 320-grit until buttery smooth to the touch.
- Oiling: Apply a coat of wood wax oil (or walnut oil). Let it sit for 10 minutes, then wipe off the excess with a clean cloth. This makes the wood grain pop and provides protection.
- Assembly: Once the oil is completely dry, stick the anti-slip silicone pads to the bottom.

🎉 VI. Final Showcase
When you place all your end mills neatly into the organizer, your workbench instantly becomes clean and professional.
HiMill D1S Advantages for this Build:
- High Precision: The square pockets are perfectly sized. The plastic end mill cases slide in snugly with no wobbling.
- Smooth Cuts: Almost zero tear-out on the solid wood edges; it requires minimal sanding to achieve a perfect finish.
- High Efficiency: Machined the 10mm basswood in one continuous setup.
Setup Suggestion: Place it on the workbench right next to your CNC machine. Having your most-used end mills within arm's reach greatly improves workflow efficiency. You can even customize the design to add more tiers for a larger capacity!

📥 Get the Files
Ready to organize your shop? Download the blueprint files and make your own!
Download via Google Drive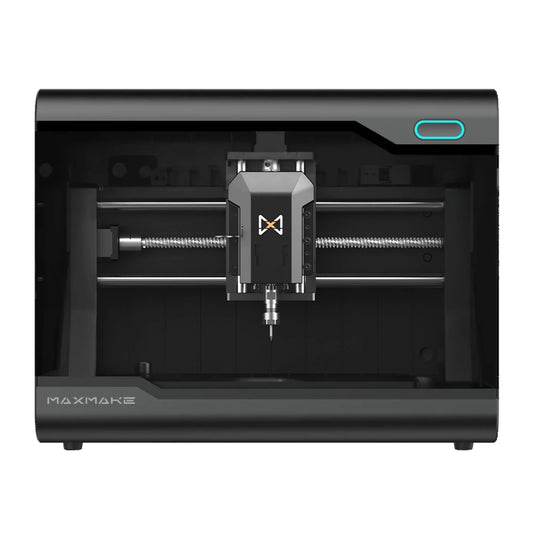


1 comment
Are you sure about the thickness of the wood?
Are the “holes” already 18 mm deep? And given the slope of the tabletop, it seems to me that we need 30 mm.