HiMill D1S CNC Project: DIY "Glowing Cat" Acrylic Jewelry Stand & Mood Light🐱✨

Every desktop lacks that one essential accessory that serves as both a functional jewelry organizer and an ambient mood light. Today, I am sharing how to utilize the HiMill D1S Desktop CNC to transform a clear sheet of acrylic into this adorable "Glowing Cat." It is designed with features to hold necklaces and earrings, and when illuminated at night, the soft glow emanating from the engraved toolpaths is incredibly soothing. Stay tuned until the end for a guide on avoiding common pitfalls during acrylic machining.
🛠️ Project Overview
- Project Name "Collecting Beautiful Moments" - Glowing Cat Jewelry Stand
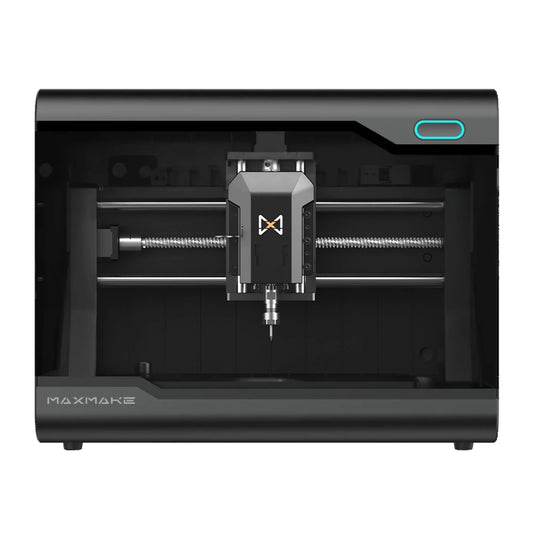
- Equipment Used HiMill D1S Desktop CNC
- Core Principle Edge-lit Acrylic Technique
- Finished Features Earring storage holes + Necklace hanger slots + Ring holder tail + Night light functionality
- Difficulty Level ⭐⭐⭐ (Requires understanding of acrylic engraving and cutting parameters/feeds and speeds)
- Machining Time Approx. 30 minutes
- Primary Material 5mm High-transparency Acrylic Sheet (Cast Acrylic recommended)
📋 1. Preparation
Achieving crystal-clear edges on acrylic without frosting or whitemarks boils down to critical tooling selection.
Hardware Bill of Materials (BOM):
- Stock Material: High-transparency Acrylic Sheet (Cast Acrylic yields superior engraving results compared to extruded).
- Base: Solid wood illuminated base (You can CNC machine the slot custom, or purchase an off-the-shelf USB LED base).
- Workholding: Strong double-sided tape (Acrylic surfaces are slick; secure adhesion is vital to prevent part shifting during machining).
Recommended Tooling (Acrylic Specific):
-
Cutting/Drilling: Single Flute Spiral End Mill (Recommended diameter: [1.5mm]).
- Reasoning: Single flutes provide large chip evacuation channels and rapid heat dissipation, which prevents the acrylic from melting and welding back onto the cutter.
-
Surface Engraving (Cat features/Text): V-bit Engraver (e.g., 20° or 30° included angle) or Ball Nose End Mill.
- Technique: V-bits create finer, sharper lines that are highly effective at refracting light for the glow effect.

💻 2. Design & CAM Strategy
This design balances aesthetic appeal with practical utility:
Functional Zones:
- Cat Whiskers: Designed with recessed slots intended for hanging necklaces.
- Cat Belly: Features an array of 34 small holes specifically for organizing stud earrings.
- Cat Tail: Designed with a slight upward curl suitable for holding rings.
- Text Area: "collect beautiful moment" engraved at the bottom section.
Step 2.1 CAM Best Practices & Pitfall Avoidance (HiMill D1S Parameters)
The primary risk when machining acrylic is material melting or "chip welding" onto the cutter tool due to friction heat.
-
Engraving (Lines & Text):
- Depth of Cut (DOC): A shallow cut of [0.2mm - 0.3mm] is sufficient. Excessive depth risks material breakage, while insufficient depth results in poor light refraction for the glow effect.
- Strategy: Trace / Profile on Line.
-
Drilling (Earring Holes):
- Method: Peck Drilling. This cycle ensures periodic tool retraction, which is essential for efficient chip evacuation and heat dissipation.
-
Cutting/Profiling (Outer Contour):
- Spindle Speed: 13000 RPM
- Feed Rate: 600mm/min (Crucial Point: Maintain a high feed rate. Slower feeds increase dwell time and friction, significantly increasing the risk of melting the material).

⚙️ 3. Machining Process
Witness the HiMill D1S's whisper-quiet operation as acrylic chips dance like snowflakes during machining.
-
Workholding: Remove the bottom protective film from the stock material and secure it securely to the wasteboard using strong double-sided tape.
- Note: It is recommended to leave the top surface masking layer intact initially; this protects the face of the acrylic from scratches caused by swarf during engraving.
-
Machining Sequence:
- First, execute the engraving toolpaths for internal features like text and expressions.
- Next, perform the drilling operations for the earring holes.
- Finally, run the profile contour cut-out (performing the cut-out last ensures the part remains securely held by the stock material throughout the prior operations).

🎨 4. Post-Processing & Illumination
This is the most satisfying stage—masking removal!
- Masking Removal: Peel off the surface protective paper to reveal the crystal-clear acrylic body beneath.
- Cleaning/Deburring: If there are minor burrs on the cut edges, gently remove them with a scraper or deburring tool. If static dust clings to the surface, wipe it down with a damp cloth or an anti-static wipe.
-
Assembly: Insert the finished acrylic plate into the slot of the solid wood LED base.
- Note: The slot width must match the acrylic thickness accurately (maintain a tolerance of approximately +0.2mm) to ensure a snug, stable fit.
🎉 5. Showcase

When illuminated, light flows along the engraved toolpaths. The cat’s silhouette and the text instantly appear to float in mid-air, resembling a suspended neon sign.
HiMill D1S Fabrication Advantages:
- Crystal-Clear Edges: When paired with the recommended single-flute end mill, the cut edges are remarkably smooth and transparent, often eliminating the need for post-process flame polishing.
- Fine Detail Engraving: Even small, intricate cursive script like "beautiful" is rendered clearly with sharp definition and zero edge chipping.
Placement Suggestion:
Place it on a nightstand or vanity and adorn it with your cherished jewelry. It serves distinctively not only as an organizer but also as a warm, ambient night light.