


DIY CNC Cookie Mold: Carving 3D Tiger Relief in Beech Wood (HiMill D1S Guide)🐯🍪

Still using generic plastic cookie cutters? It's time to bring some serious hardware to your baking with CNC! Today, I’m sharing how to use the HiMill D1S Desktop CNC to transform a block of sturdy beech wood into an exquisite "Roaring Tiger" cookie mold.
From 3D relief toolpath settings to food-grade surface finishing, this is a complete, hardcore tutorial. File links included at the end!
🛠️ Project Overview
- Project Name 3D Relief Chinese Zodiac Tiger Cookie Mold
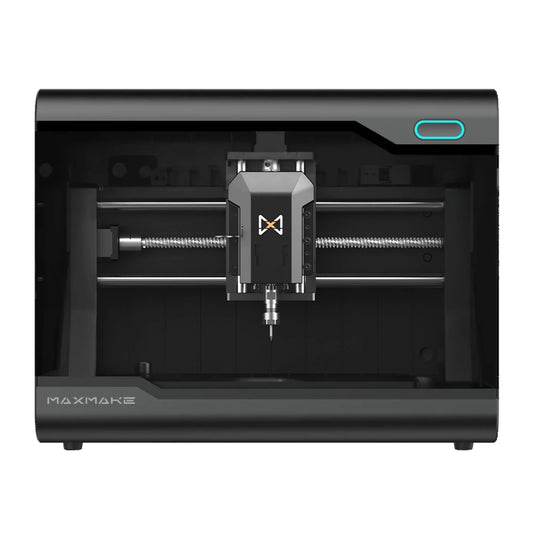
- Equipment Used HiMill D1S Desktop CNC
- Core Challenges 3D surface finishing (restoring fine fur details) + hardwood milling
- Finished Features Strong deep relief dimensionality, smooth mold release, food-safe
- Difficulty Level ⭐⭐⭐ (Requires mastery of 3D toolpath strategies)
- Machining Time Approx. 3 hours
- Main Material [e.g., 20mm] thick premium Beech wood
📋 1. Preparation
When making food utensils, material selection is paramount.
Hardware Materials (BOM):
-
Wood Stock: Beech.
Why Beech? High hardness, fine grain, odorless, and durable wear resistance make it the optimal choice for making food molds. - Finishing: Food-grade mineral oil (or walnut oil, beeswax).
- Cleaning: Bristle brush (for clearing deep-seated wood chips).
Recommended Tools (For 3D Relief):
If you want to carve details like the tiger's whiskers, standard flat end mills just won't cut it.
-
Roughing Bit: Single Flute Up-cut Spiral End Mill —— Used for quickly clearing out the bulk of the material.
-
Finishing Bit: Tapered Ball Nose End Mill.
Function: Leaves an extremely smooth surface finish after machining, requiring almost no sanding.

💻 2. Design & CAM Strategy (The Secret of 3D Relief)
When creating molds, the most crucial element is a shift in perspective: the pattern must be machined as a concave (negative) relief so that the final cookie emerges as a convex (positive) shape.
Step 2.1 Model Preparation
- I generated the 3D tiger model using a grayscale height map.
- Key Setting: Ensure the model is inverted (recessed). Set the depth to approximately [e.g., 6mm - 8mm]. (If it's too deep, demolding becomes difficult; if it's too shallow, the relief lacks definition.)

Step 2.2 CAM Toolpath Settings (HiMill D1S Parameters)
Beech wood is relatively hard, so the machining parameters shouldn't be too aggressive.
-
3D Roughing:
• Strategy: Raster (Parallel) or Offset Clearing.
• Stock to Leave: 0.5mm (leaving material for the finishing bit to cut).
• Feed Rate: [600] mm/min. -
3D Finishing —— The Moment of Magic:
• Strategy: Raster Angle set to 45 degrees (this makes tool marks significantly less visible).
• Tool: R0.5 Tapered Ball Nose End Mill.
• Stepover: CRITICAL! Set this to 8%-10% of the tool diameter (e.g., 0.1mm).
◦ The Principle: The smaller the stepover, the smoother the finished surface, requiring almost no post-process sanding. While this increases machining time, you can simply let the HiMill D1S run unattended—the results are well worth the wait.


⚙️ 3. CNC Machining Process
Time for the HiMill D1S to go to work!
-
Roughing Stage: The machine moves rapidly with chips flying. You won't recognize the tiger form just yet; you'll only see a deep pocket being cleared out.
-
Tool Change: Swap in the fine tapered ball nose end mill and re-zero the Z-axis origin point.
-
Finishing Stage: This part is incredibly satisfying to watch. The tool tip acts like a precision embroidery needle, peeling away the wood bit by bit. The tiger's nose, eyes, and even the distinct "王" (King) character texture on its forehead gradually emerge.
◦ Observation: Thanks to the HiMill D1S's stable spindle, there was zero charring or burning on the surface, even when milling hard beech wood. The resulting finish is incredibly clean.

🎨 4. Post-Processing & Food-Grade Finishing (Food Safety)
The mold might be slightly "fuzzy" fresh off the machine. Proper post-processing is crucial to ensure dough doesn't stick.
-
Cleaning: Use a stiff bristle brush to remove residual dust from deep crevices.
-
Sanding: Gently sand the interior of the mold using sanding sponges (400-600 grit). Be careful not to flatten the fine details.
-
Oiling:
- Submerge the mold in food-grade mineral oil or apply a thick coat of beeswax.
- The beech wood will darken after absorbing the oil, taking on a warm, lustrous sheen. This creates a protective barrier against mold and cracking.
- Allow it to dry and cure for 24 hours before use.
🍪 5. The Final Test: Baking Tiger Cookies (Testing)
You won't know how good the mold truly is until it goes into the oven.
-
Recipe Recommendation: You must use a "no-spread" cookie recipe (moderate butter ratio, no baking powder). Otherwise, your baked tiger will turn into a "fat cat."
-
Molding Technique: Lightly dust the mold with flour to prevent sticking. Press the dough firmly into the cavity, give it a gentle tap, and a lifelike tiger pops right out.
-
Baking: Hot out of the oven!
Results:
Look at the photos! The tiger's fur texture on the cookies is clearly visible, and the eyes are sharp. The HiMill D1S perfectly replicated every detail of the digital model.

🎉 6. Conclusion
The true satisfaction of fabricating custom molds with the HiMill D1S lies in the ability to transform any design into a culinary creation. Whether it’s zodiac symbols, logos, or intricate totems, this machine can realize them all.
A Few Pointers for Novices:
-
Tool Selection: You absolutely must acquire a "Tapered Ball End Mill." It is the ultimate tool for 3D relief carving operations.
-
Patience: 3D finishing toolpaths have longer cycle times, but avoiding the need for manual post-processing of fine details makes the wait entirely worthwhile.
If you are also a baking enthusiast, fire up your CNC and launch your own bespoke bakery!


1 comment
thank you