Skip to content
Free Shipping on Orders over $300
Email:hello@maxmake.com

MAXMAKE CNC Blog

[CNC Tutorial] How to Machine Custom Aluminum Artisan Keycaps with HiMill D1S

by CHENmaxmake 16 Jun 2026 0 comments
[CNC Tutorial] How to Machine Custom Aluminum Artisan Keycaps with HiMill D1S

Machining metal on a desktop CNC doesn't have to be intimidating. In fact, it's the perfect way to craft high-end, personalized accessories for your workspace.

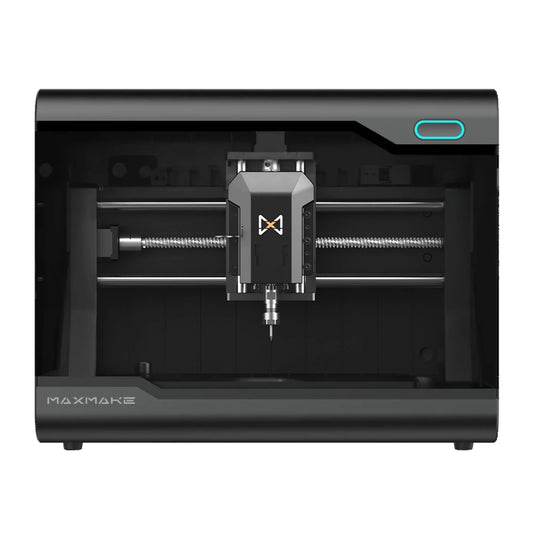
Today, we're putting the MAXMAKE HiMill D1S to the test by creating the ultimate desk accessory: a custom aluminum artisan keycap. Achieving that premium tactile feedback requires flawless 3D surfacing and dead-on 0.05mm accuracy for the switch stem. We'll walk you through the entire process, including the exact feeds and speeds for micro-machining aluminum. Ready to elevate your keyboard game? Let's dive into the build.


I. Project Overview

Project Name DIY Custom Aluminum Artisan Keycap Set
Equipment Used MAXMAKE HiMill D1S Desktop CNC
Core Principles Micro 3D Surfacing + Flat Engraving + Switch Stem Adaptation
Function & Scene Keyboard Modding, Desk Aesthetics, Custom Gifts, Brand Merch
Difficulty Level Advanced (Requires strict tolerance control for the MX switch stem and surface finishing)
Cycle Time Approx. 16 Hours (Batch processing)

II. Preparation & Design

The core of an exceptional artisan keycap lies in "precise stem fitment + ergonomic profile + harmonious material finish." Planning your keycap dimensions, height, and relief details ahead of time will exponentially improve your success rate.

1. Materials List

Keycap Blank: 100x100x10mm solid aluminum block.
Post-Processing: Assorted sandpaper (400-2000 grit), metal polishing compound, buffing pads.
Auxiliary Tools: 3D Edge Finder Probe.

2. Tooling Selection

A universal set optimized for high-speed aluminum keycap machining:

3.175mm Single Flute Spiral End Mill: Dedicated for keycap roughing and bulk material clearance.
1mm Single Flute Spiral End Mill: Dedicated for milling the MX cross-stem cavity on the back.
2.5mm Ball Nose End Mill: For finishing the smooth, contoured outer profile of the keycap.
0.2mm Flat Bottom Engraving Bit: For engraving the fine top-face patterns.
Tooling and materials required for CNC machining custom aluminum keycaps on the HiMill D1S.

III. CAM Settings (Machining Parameters)

These universal parameters are specifically optimized for micro-metal parts on desktop CNC routers. Copy them to your CAM software, and even beginners can achieve flawless results.

A. Metal Keycap Roughing (Universal)

Tool: 3.175mm Single Flute Spiral End Mill (Metal-specific)

Stepover (Ae): 1 mm

Stepdown (Ap): 0.2 mm

Cutting Feed: 200 mm/min

Plunge Feed: 100 mm/min

Spindle Speed: 13,000 RPM

B. Metal Keycap Finishing

Tool: 2.5mm Ball Nose End Mill (Metal-specific)

Stepover (Ae): 0.1 mm

Stepdown (Ap): 0.1 mm

Cutting Feed: 200 mm/min

Plunge Feed: 100 mm/min

Spindle Speed: 13,000 RPM

C. Metal Keycap Pattern Engraving

Tool: 0.2mm Flat Bottom Engraving Bit (Metal-specific)

Stepover (Ae): 0.1 mm

Stepdown (Ap): 0.1 mm

Cutting Feed: 200 mm/min

Plunge Feed: 100 mm/min

Spindle Speed: 13,000 RPM

D. Metal Keycap Cross-Stem Cavity Machining

Tool: 1mm Single Flute Spiral End Mill (Metal-specific)

Stepover (Ae): 0.1 mm

Stepdown (Ap): 1 mm

Cutting Feed: 200 mm/min

Plunge Feed: 100 mm/min

Spindle Speed: 13,000 RPM

CAM software settings for 3D machining custom aluminum keycaps.

IV. Machining Process

The high-precision spindle and stable positioning of the MAXMAKE HiMill D1S ensure that even tiny parts maintain immaculate accuracy, with keycap stem tolerances controlled within 0.05mm.

1.
Workholding: Clamp the aluminum block securely using toe clamps. This guarantees that positional deviation is controlled within 0.01mm, preventing shifting during machining.
2.
Batch Roughing: Run the toolpaths to machine all keycaps on the block. This removes the bulk material in one go, quickly defining the outer shape while leaving a stock allowance for finishing.
3.
Detail Finishing: Swap to the 0.2mm flat bottom engraving bit to focus on carving the smooth sloped surfaces, perfectly restoring the exquisite details of the design draft.
4.
Bottom Stem Pocketing: Machine the switch stem cavity on the bottom of the keycap. Proper execution ensures it mounts onto the mechanical switch tightly without wobbling or binding.
HiMill D1S CNC spindle precision milling an aluminum artisan keycap.

V. Post-Processing & Assembly

A standardized post-processing workflow perfectly balances industrial texture with a premium tactile feel.

1.
Deburring: Use 400-grit sandpaper to sand the cut edges and remove machining marks. Switch to 800-1200 grit to refine the finish and prevent scratching your fingers or the keyboard.
2.
Surface Polishing: Sand all surfaces with 1500-2000 grit paper, then follow up with polishing paste and a buffing pad to achieve a mirror or frosted finish.
3.
Enamel Infill (Optional): For relief characters, use specialized enamel paint to fill the recesses. Wipe away the excess once dry to make the characters pop.
4.
Fitment Testing: Mount the keycap onto the corresponding mechanical switch. Test the tactile feedback to ensure it presses smoothly without friction or sticking.
5.
Final Tuning: Check the surface flatness, character clarity, and stem fitment. Confirm there is no wobbling, completing the custom keycap set.
Polishing and assembling the custom CNC machined aluminum keycap onto a mechanical switch.

VI. Final Showcase: Illuminate Your Desktop

When exquisite craftsmanship meets your daily setup, the result is breathtaking:

Ages with You: Metal keycaps (especially brass or raw aluminum) will develop a unique vintage patina from use; Acrylic/POM keycaps will become smoother over time, serving as a personalized mark of your desk.
Versatile Fit: The minimalist profile adapts to various keyboard themes, perfect for both hardcore gaming setups and clean office workstations.
The Perfect Gift: A handcrafted, custom keycap set carries immense thought, making it the ultimate gift for friends entering the mechanical keyboard hobby.
Finished custom aluminum artisan keycaps installed on a mechanical keyboard.

💡 HiMill D1S Review

The creation of this custom keycap set once again proves the "all-rounder" capabilities of the HiMill D1S desktop CNC machine:

1.
3D Machining Ceiling: It doesn’t just excel at 2D flat routing. It effortlessly handles the micro 3D surfacing of tiny parts, replicating surface textures and fine characters with incredible clarity.
2.
Rock-Solid Precision: From roughing to finishing, the repeat positioning accuracy ensures that every single keycap has identical dimensions and depth, requiring no recalibration.
3.
Limitless Creativity: As long as you can CAD it, the D1S can mill it. Easily build your own custom keyboard brand and unlock endless possibilities in desktop manufacturing!

Get the Files & Start Making

Ready to customize your keyboard? Download the design blueprints and start machining!

Download via Google Drive
Prev post
Next post

Leave a comment

All blog comments are checked prior to publishing

Someone recently bought a

Thanks for subscribing!

This email has been registered!

Shop the look

Choose options

Edit option
Back In Stock Notification
Compare
Product SKU Description Collection Availability Product type Other details

Choose options

this is just a warning
Login

Before you leave...

Take 20% off your first order

20% off

Enter the code below at checkout to get 20% off your first order

CODESALE20

Continue Shopping